

Did you know that Lightroom has opacity sliders? Lightroom’s preset opacity slider allows you to quickly adjust the overall opacity and give you more control over your edits. It’s easy to use – just drag the slider towards the left for lower opacity and more subtle edits or towards the right for higher opacity and bolder edits. You can adjust to the exact level you want in order to get the desired results. It’s also beneficial for fine tuning and narrowing down the overall adjustments made to the image. In this blog post, we’ll walk you through how to adjust your preset intensity in Lightroom mobile and desktop.
How to Adjust Preset Intensity in Lightroom Mobile
Step 1: Apply a preset to your photo
Step 2: Tap on the preset icon
Step 3: Use the slider to increase or decrease the preset intensity to your liking
More of a Visual Learner? Check Out This Reel We Posted to Our Instagram:

For Lightroom Desktop (Lr) Users
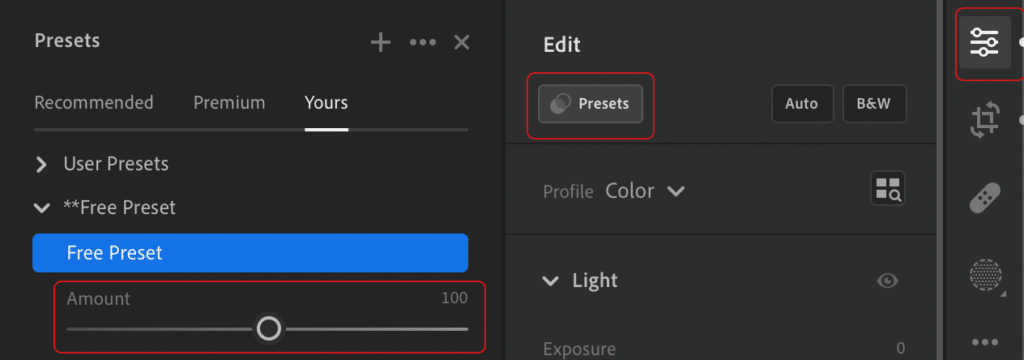
Step 1: On the right side panel, click on the Edit icon
Step 2: Then, click on the Presets button
Step 3: Apply a preset
Step 4: Use the slider to increase or decrease the preset intensity to your liking
For Lightroom Desktop Classic (LrC) Users
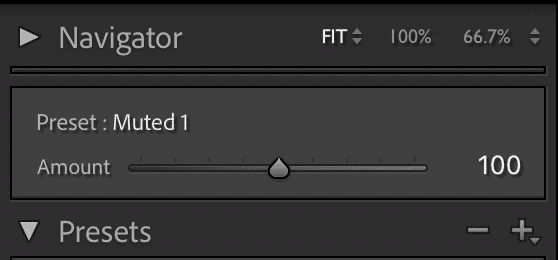
Step 1: In the Develop menu, apply a preset to your photo
Step 2: The opacity slider will appear at the top of the preset panel on the left-hand side. Use the slider to increase or decrease the preset intensity to your liking
Now that you know how to adjust your preset intensity in Lightroom, it’s time for the fun part: editing! Take a look at our preset collections and find your perfect match. Our filters are high-quality, easy-to-use, and they’ll transform your content into the aesthetic of your dreams.
Hero image edited with the Natural Collection.